Friday, April 26, 2013

Gray Vintage Mirror

I love mirrors, and I have them all over my house...
I did this vintage, wooden frame mirror for my cousin, Marideth, and her husband to put in their new house. I am really happy with the way it turned out. 
I love the original gold accents with the gray. 
She wanted it to have a shabby chic, distressed look, so I did some hand sanding on the edges. I finished it off with a coat of my go-to brown antiquing glaze.
Paint: Benjamin Moore Galveston Gray
Glaze: Ace Artistic Finishes glaze (10 shots of Raw Umber)
;) Mimi

Tuesday, April 9, 2013

Burlap & Twine Banner

I made this fun, shabby chic banner for a good friend's daughter. 
Click here to see the inspiration pic.
First, I used a template made out of card stock to trace my 9 pieces of burlap.
Next, I starched and ironed them front and back. On the back I folded over a flap and ironed a crease (so it would be easier to hot glue them on the twine later).
**The starching and ironing is important to get the creases out of the burlap and also so it will not unravel nearly as much.
Then, I used my homemade heart and "L" stencils and dabbed the Dove Wing paint onto the fronts.
I outlined with a small paint brush and then went back and filled them in.
Last, I spread my 90" of twine out, put my "L" in the middle, and spaced 4 hearts on either side. I put a line of hot glue in each fold, made sure the twine was glued in on the back of each piece, and done!
Here's another shot of it hanging in my extra bedroom.
My Materials List:
Twine (I used 90")
Burlap peices 7"x4"
Spray Starch
Paint: Benjamin Moore Dove Wing
Heart and Letter homemade stencils out of thick paper
sm foam dabber 
sm paint brush for the back
Hot Glue Gun
;) Mimi

Saturday, March 30, 2013

Old Cabinet Make-over

I found this old hand made cabinet at a local junktique store and thought 
I could do something cute with it...
Before Pics:
The original paint is bumpy, like tiny balls (hmm)
I gave the whole thing two coats of antique white paint before I went on with Benjamin Moore Trout Gray. Then I sanded the edges and all over to give it a very distressed look. I like how the original bumpy paint came through when I sanded it. I rubbed my go-to glaze all over it to dull the paint and make it look older. 
I topped it off with a cute antique glass knob I already had.
It is currently residing in my entry hall; but will likely move to the back porch soon.
paint: Benjamin Moore Trout Gray
glaze: Ace Artistic Finishes glaze (10 shots of Raw Umber)
antique glass knob
;) Mimi

Sunday, March 24, 2013

Vintage Rolling Pins Display

This is another idea I got from my favorite blog, The Inspired Room, click HERE to see the post. 
Here is my inspiration pic...
First, I got the beadboard from my local Ace Hardware and cut it to 2'x2.5'. I also cut a 2'x2.5' 
piece of plywood for strength and used Liquid Nails to secure the 2 boards together. 
Next, my grandpa and I cut the pegs on the band saw and put the holes in the board.  
I painted the pegs and used Liquid Nails to secure them into their holes. 
Then, I did some sanding on the edges of the board and the pegs, stained the sanded parts with my handy-dandy Stain Marker, and went over both the board and pegs with a thin coat of glaze.
Last, I screwed 4 large screws through the board and into the wall on the 4 corners to hang it. 
Rolling Pin Collection: I started out with the one with red handles and the one with 
light teal handles. I believe they were both my great-grandmother's. My grandmother 
gave me the marble one (very heavy) which I love. I bought the hand-carved one on the 
top and the big one on the very bottom (which I was told is very old). 
I am now a lover of old rolling pins and my collection has grown to 11...

My Materials List:
5 vintage/antique rolling pins
beadboard 2x2.5'
plywood 2x2.5'
pegs - Hobby Lobby or online 
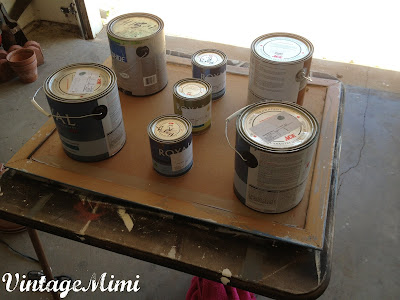
paint - Antique White Benjamin Moore
Minwax Wood Finish Stain Marker (I used Provincial)
Glaze - Ace Artistic Finishes 10 shots Raw Umber
Drill, 4 long screws, screwdriver
;) Mimi

Friday, March 15, 2013

To-Do Organization Board: Magnetic Chalkboard

My sister mentioned to me that she would love a to-do board to put important papers, bills, notes, etc. I told her I had seen a post from my favorite blog, The Inspired Room, and I would make it happen.  So, I started looking at different blogs that had a DIY version and made a plan to make my own. 
First, I had my dad cut me a 22x28 piece of sheet metal (magnetic). My dad being a welder comes in handy pretty often... :)
Next, I rolled on (with a tiny roller) 3 coats of Chalkboard paint. I did find out during my online research that Chalkboard paint and Magnetic paint do not work together and the magnetic paint won't work. (So, if you are trying this yourself don't try that route.)
Then, I primed, painted, sanded, and glazed my frame. 

After letting the chalkboard paint and the frame paint dry completely; I used LiquidNails to glue the sheet metal and frame backing in and together. I also topped off the secureness by screwing in 8 small screws to hold the backing in place. I used two heavy duty picture hangers to hang it.
The last part of the project was vintage (of course), unique magnets. My mom and I went through all the costume jewelry we have from great-grandmothers and found some fun clip-on earrings and broaches that were perfect. 
I got this idea from a blog post I came upon while researching this project...
I used E-6000 to attach the magnets to the earrings and broaches. 
Now, that I know how to do it I will be making one for myself and one for my mom...So, more to-do/organization boards to come...
;) Mimi

Wednesday, March 13, 2013

Spring front door wreath

 I have been wanting to get a cute wreath for my front door for a while now. My front door is a dark charcoal gray, so I didn't think a wood wreath would really show up.
I found this one at a great local "junktique" store and thought the green moss 
look was fun and would show up against my black door (yay!)

I got these fake flowers at Hobby Lobby to give it more of a spring look. 
I hung it on the glass door with a 3M Command hook.
I'm planning to switch out the flowers and leave it up all year. 
;) Mimi


Thursday, February 21, 2013

Decorating with Vintage Books

Old books have become a decorating favorite of mine and I have them all throughout my house. They add a vintage homey feel, pops of color, and history to my home. I (obviously) have a love for things that are old; so finding a book that is from the early 1900s is very exciting to me. Most of my old books are from my grandparents' houses and some are from antique/consignment stores in Abilene.

The Mother Goose book on the left is my Granddaddy's (1931) and the 
Story Book on the right is my Dad and aunt's (1950). The books in the middle 
are my other grandfather's books from when he was growing up.

I am a major book lover and always have been. I love having my "old friends" to look at, re-read,  and rearrange from time to time. (Which is why I have a love/hate relationship with Kindle for IPad. Downloading my new book instantly is amazing...But, if I love the book I want it on
my bookshelf not hiding on my IPad!) 
;) Mimi
Blogging tips